How To Convert a Standard car to COT version
How To Convert a Standard car to COT version
Since Team Up International is not supplying any more Nascar licensed New Cars or body shells, we must be creative and make things work that normally wouldn't.
Before we get into actual mechanical changeovers heres why the old style
"Monte Carlo" shells WILL NOT WORK.
Lets review the differences....
Since the regular 1-6th scale Nascar Rc cars were first produced, they had Foam Padded bumpers (First Edition Base Versions).
The First Edition Base versions, aka "Foam Padded Base Versions", were hard as hell to steer and drive, FULL RIGHT or FULL LEFT, FULL SPEED forward or backward, but no protection from the slightest bump and cracking the shell or completely destroying the shell. HARD TO "drive", they drive like a falling brick, is what FULL FUNCTION means.
Then the First Edition Base versions, aka "Foam Padded Base Versions", were RECALLED and REDONE to incorporate a hard plastic front and rear bumpers, making them the 2nd Edition Base versions. Still were hard as hell to steer and drive, FULL RIGHT or FULL LEFT, FULL SPEED forward or backward, but no protection from the slightest bump and cracking the shell or completely destroying the shell. HARD TO "drive", they drive like a falling brick, is what FULL FUNCTION means.
Then REDONE again to have "Added Features" in which had a hard plastic front and rear bumpers, PLUS "Hobby Grade Features", with digital proportional steering and variable speeds, this saved many of shells being destroyed in the first few minutes of use. This makes the First "Hobby Grades" or "Added Features" cars 3rd Generation Nascar Rc cars. Not to mention more fun to "drive", they drive like a real car, is what digital proportional means.
First Edition - Second Edition Base Version shells to be used on Hobby Grades and visa/versa
Not only did they make the 3rd, 4th, 5th Generation 1-6th scale Nascar Rc cars ALL "Hobby Grades" phasing out the 1st and 2nd Edition Base versions, but the front nose was redone - shortened as well as the rear of the car. Their noses and tails are not that "tall" for fitting "over the foam padded bumper" making the car not as "low to the ground" as the 1st generation Foam Padded Base version shells did.
The 2nd generation "Hard Plastic Bumper Base Version car" shells or "Monte Carlo style" shells WILL FIT okay on the First Edition Base versions, aka "Foam Padded Base Versions"
AND
The 3rd, 4th generation "Hobby Grade" shells or "Monte Carlo style" shells WILL FIT okay on the First Edition Base versions, aka "Foam Padded Base Versions"
BUT
First Edition Base versions, aka "Foam Padded Base Versions" shells WILL NOT FIT WELL on ANY of the 2nd, 3rd, 4th, 5th generation cars. First Edition Base versions, aka "Foam Padded Base Versions" shells, they are too "tall in the nose and tails" to fit without breaking the DISCONTINUED 1st Edition shells or cutting them down. The wheelbase is slightly longer on these than the Hobby Grades.
Personally, modifying a Rare discontinued shell is wrong and I wouldnt recommend to do that. Replacing that shell is now near impossible unless you can find the original car new, unused.
Second Edition Base versions shells, aka "Hard Plastic Bumper Base Versions" shells ARE INTERCHANGEABLE with the "Hobby Grade" or Added Features" cars. They WILL FIT WELL on ANY of the 2nd, 3rd, 4th generation cars. They WILL NOT FIT WELL on the 5th Generation COT chassis. This is shown why below.
COT - 5th Generation "Hobby Grades"
COT: Car of Tommorrow / Car of Today
February 2008- Present day
Nascar redesigned the standard Nextel Cup Cars to be safer and more interchangeable INDENTICAL between makes/brands like Dodge and Chevrolet and Ford. More costs savings for the teams and standardized parts.
Team -Up International followed suit and produced 3 COT 1-6th scale Nascar Rc Cars between 2009 and 2010 for us "older youngsters".
Dale Jr #88
Jeff Gordon #24
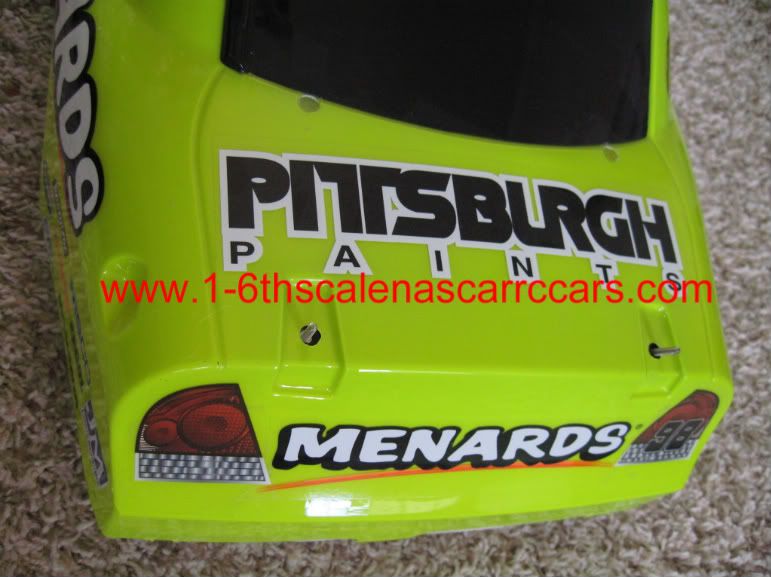
Paul Menards #98
Using a COT car is the same as ANY previous "Hobby Grade" produced, if not better.
They might have improved electronics - response and electronics -driving ability, speeds, such as the printing on the 4th and 5th Generation boxes means...
"Multi - Track Performance"
I have not "drag raced" or had the chance to race a standard "3rd Generation Hobby Grade" against a 5th Generation COT car.
Using a COT Chassis with the 2nd, 3rd, 4th Generation body shell
Shown below is a standard Menards COT car as it is from the box
Nice Nascar 1-6th scale Replica as its intended to be
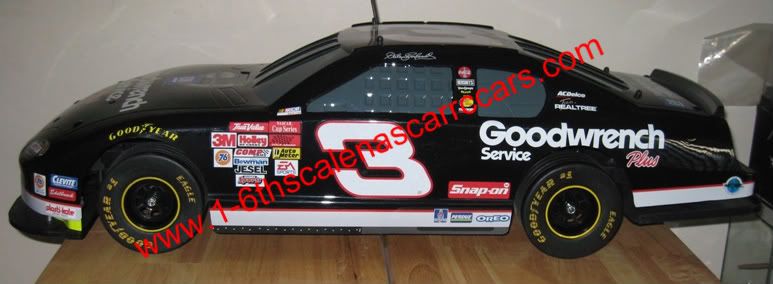
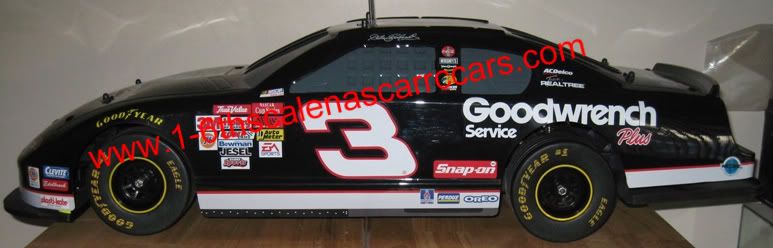
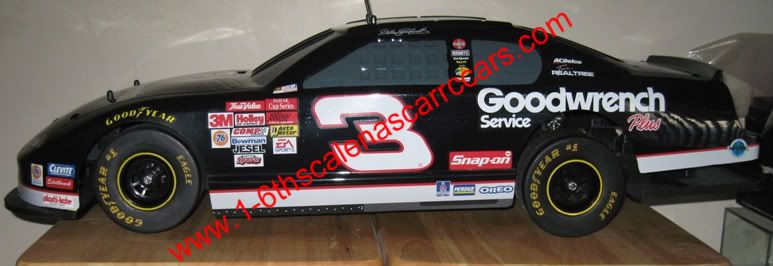
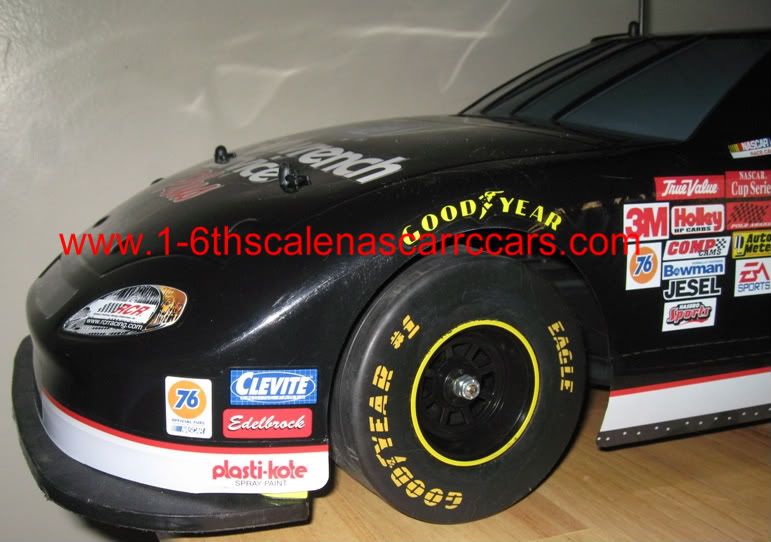
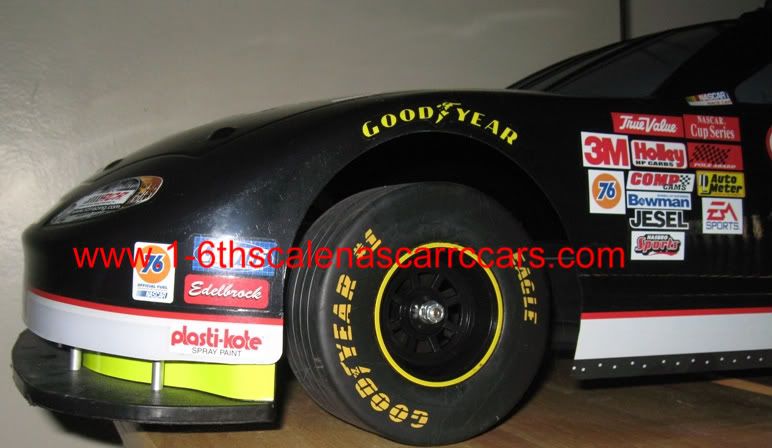
Shown below is the same chassis with a standard 2nd through 4th Generation "Monte Carlo" style shell. With the Dale Sr, #3 shell sitting directly on the chassis, the body is MUCH higher in the wheel wells and won't sit down on the front hood pins very easily because the overall "cut" of the "Monte Carlo" style shell is shorter to the ground than the COT car shells.
NOTE: the lower-longer fender side panels fender to wheel clearances and "taller" rear bumper "sheet metal" that sits INSIDE the rear plastic bumper.
Overall the "Monte Carlo" style shells sit "higher" on the COT Chassis.
Now, on the COT Chassis, you CAN remove the rubber spacers on the tops of the body pins, but this doesnt give you the clearance you need to make the car look "correct" as shown below. It still leaves "air spaces" in areas around the wheels and tail to cause the shell to "flutter" and removes the shock abosorbing quality of the rubber spacers on the chassis of the car to the shell and only adds to the danger of cracking around the body pins of a brand new shell even before you get the chance to use it.
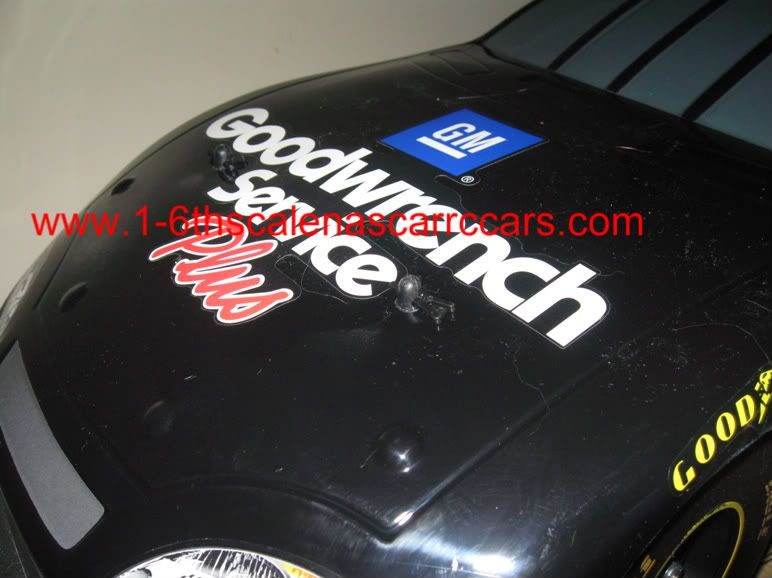
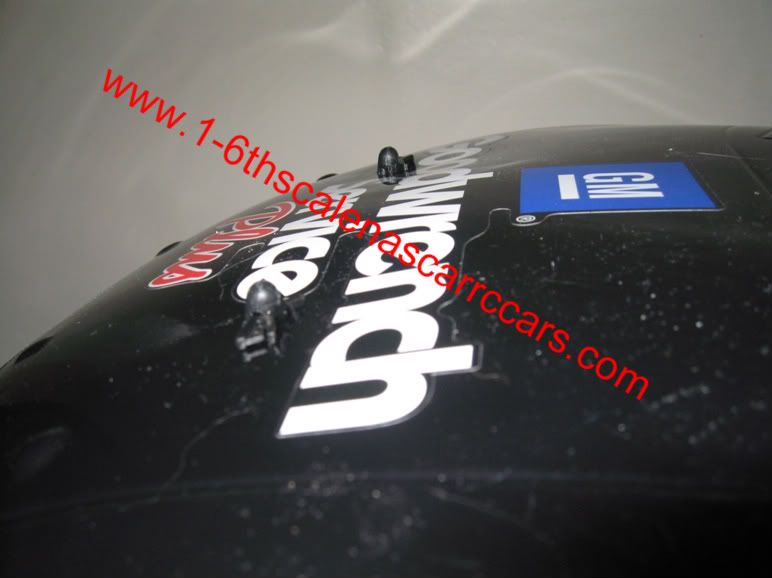
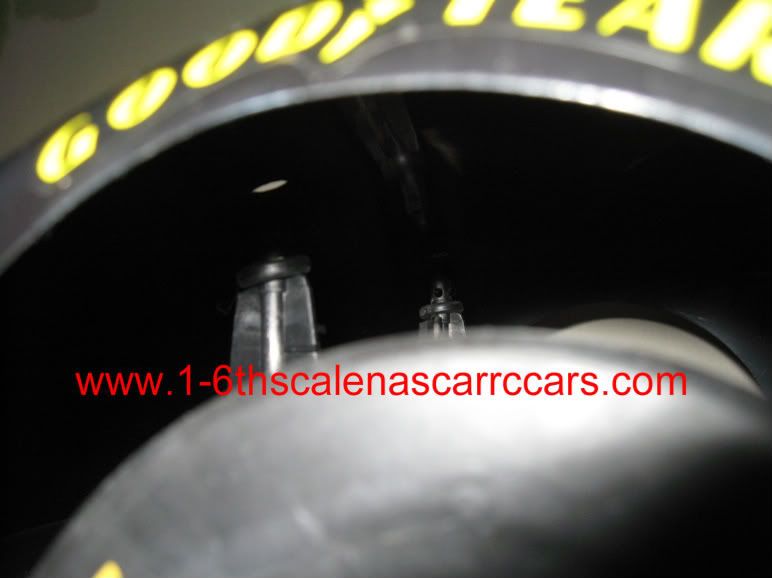
Shown below, you can even try and PUSH the Front hood down "to make it fit" but this is a bad idea all around. The rear of the shell pops up and note the "dents" on the hood without any hold down pins.
Shown below, with the Front hood down "to make it fit". Note the "dents" on the hood with hold down pins. Notice on the hood, next to the body pin, next to the E on Service, its starting to crack. Note also the fender lip around Goodyear is stressed and creased outward. Also noting that the nose is to "tall" and hits the top of the COT bumper and bottoms out.
In the two photos below...
Notice on the hood, next to the body pins, next to the E ans S on Service, its starting to crack. Can you can see a Y shaped "crazing" ??? I believe that this in itself is NOT worth ruining a good shell before it even hits the streets. Not to mention the huge airflow you get if you don't fasten it down period. Why break something when its not neccessary?
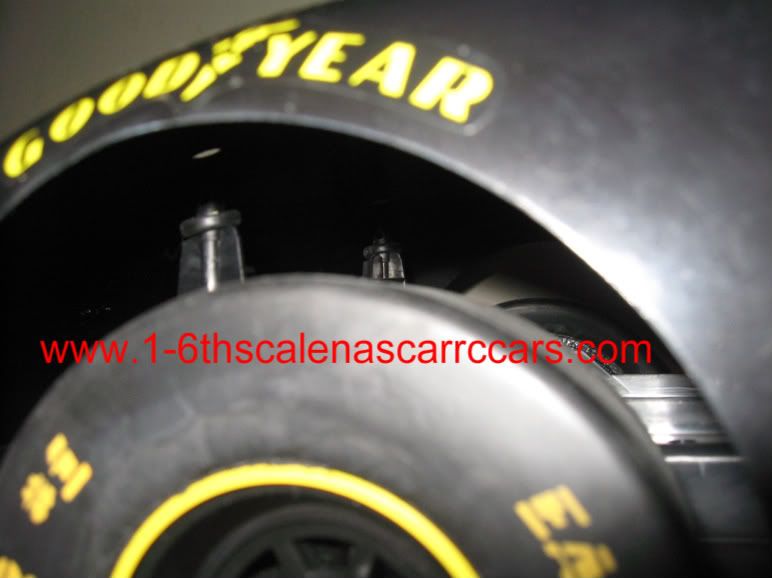
In the photos below...shows the HUGE clearance problem, about a half an inch, with under the hood pins, given the shell sitting firmly on the roof body pins and the rear body pins. In essence the front body pins are too short to correctly support the shell. Even if you made spacers for the hood pins, the shell would STILL sit too high and cause air to flow in UNDER the shell and cause it to "flutter" and crack at the body pins, if not drive weird because of the lack of downforce.

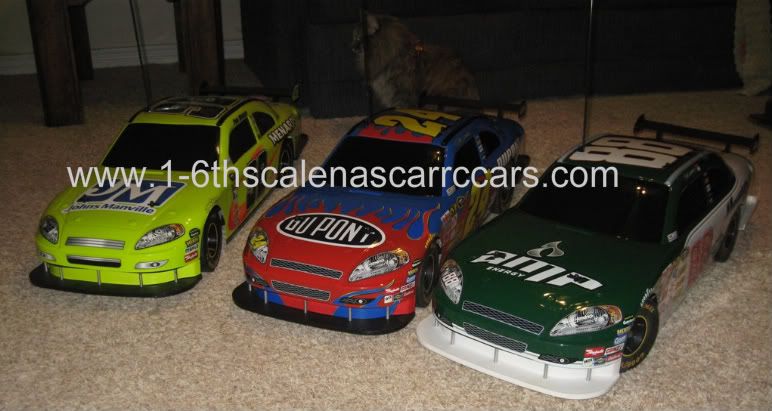
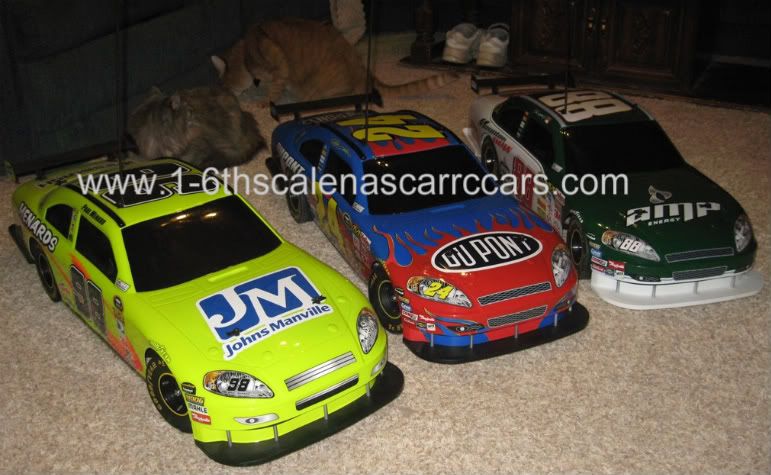
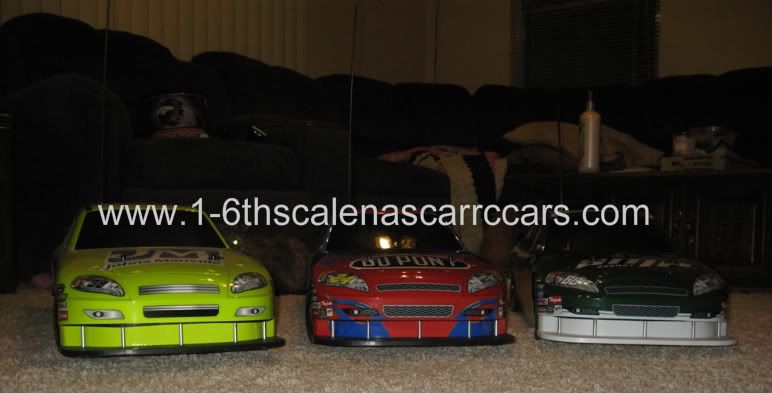
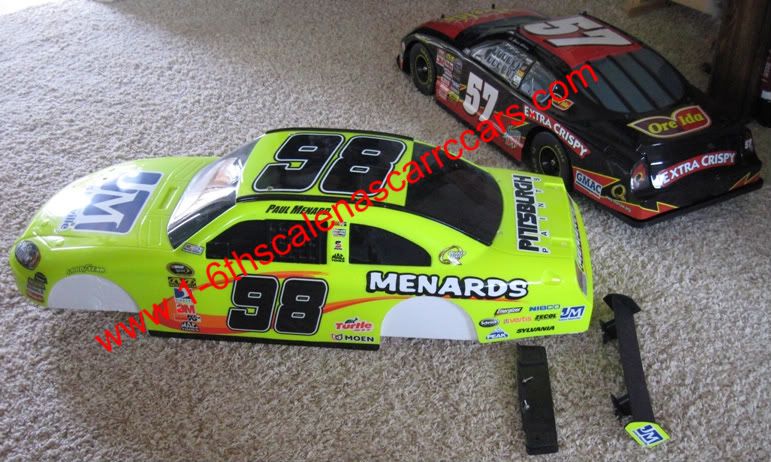
In the photos below...shows the 3 C.O.T. Cars that were available.
Left to right: Paul Menards #98 C.O.T, Jeff Gordon #24 C.O.T, Dale Jr #88 C.O.T
Notice that the front "splitters" and one rear bumper are color coordinated. Only the Dale Jr #88 has a color coordinated rear bumper.
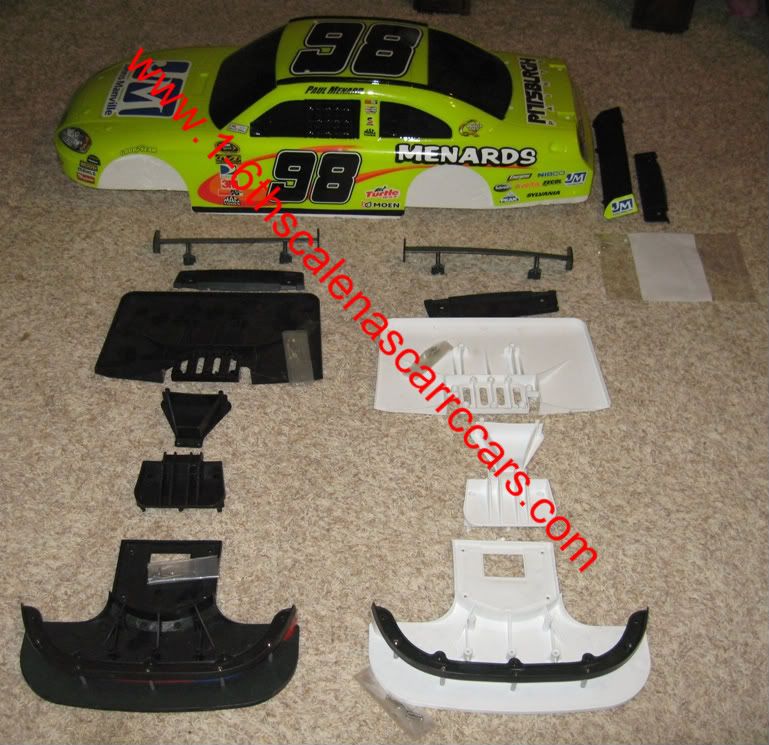
Spare parts are VERY tough to come by. If you find any GRAB THEM.

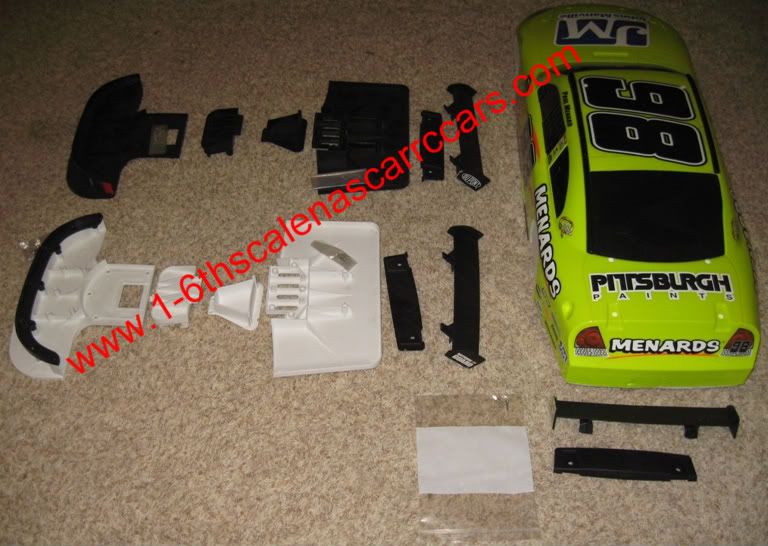
Spare parts if you are able to find any for the conversions are shown below.
Again, notice that the front "splitters" and one rear bumper are color coordinated. Only the Dale Jr #88 has a color coordinated rear bumper. Rear wings are decal - stickered car specific.
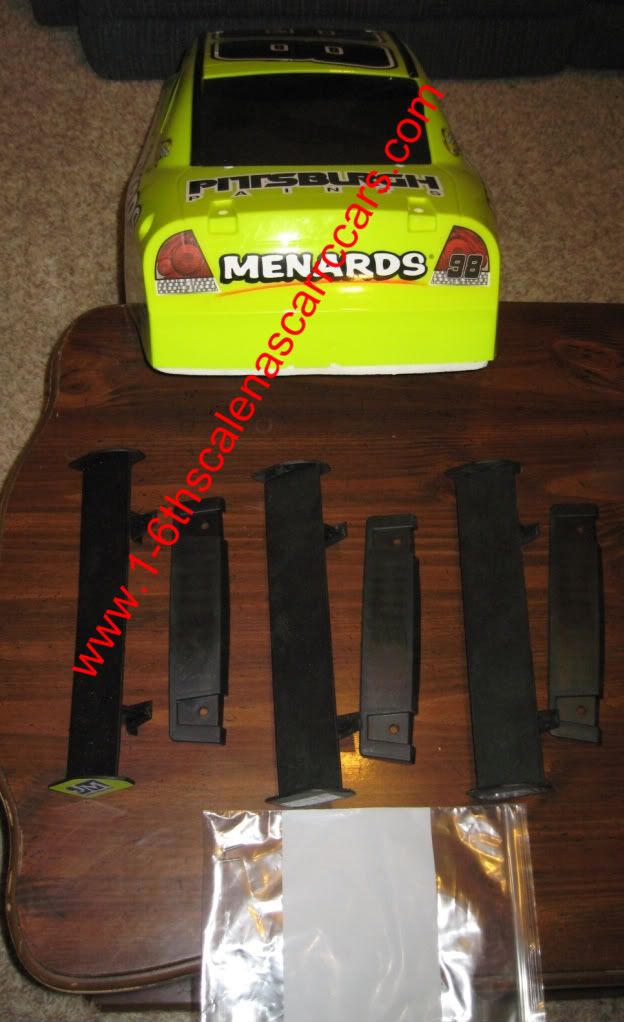
Included in these Conversion kits or spare parts kits is spare screws. Why? Because these screws are VERY VERY easy to strip out on the heads if you do not have the correct Phillips head screw driver to remove them. It takes 2 different screwdrivers to properly change a Standard "Monte Carlo" style car to a C.O.T. Car.
SOME OF THESE SCREWS are length specific to a specific point on the chassis.
Below, I will go through STEP BY STEP where which part and screw goes where.
You will need a #2 Phillips screwdriver and a FINE POINT Phillips screwdriver.
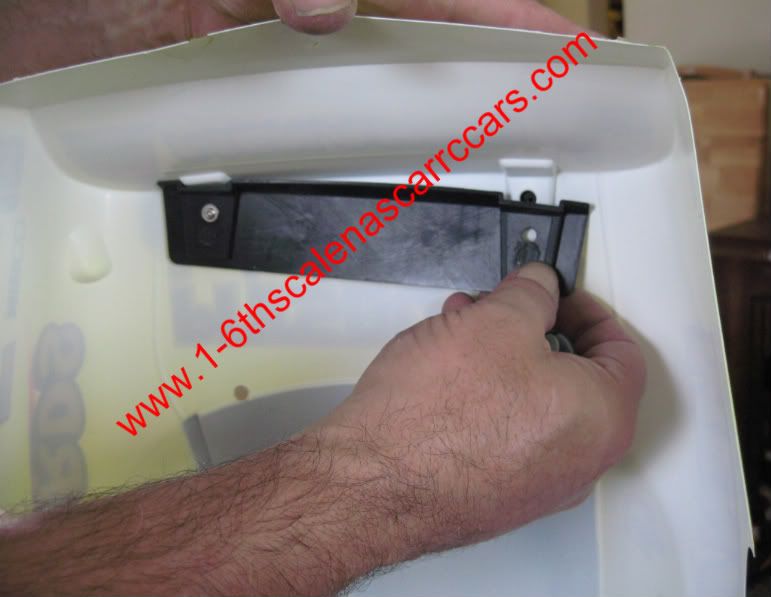
STEP #1: Rear Wing
Shown next to each other is the Brian Vickers #57 "Monte Carlo" style standard chassis that I am converting to a Dale Jr #88 C.O.T. and then a Jeff Gordon #24 C.O.T. and then a Menards #98 C.O.T car
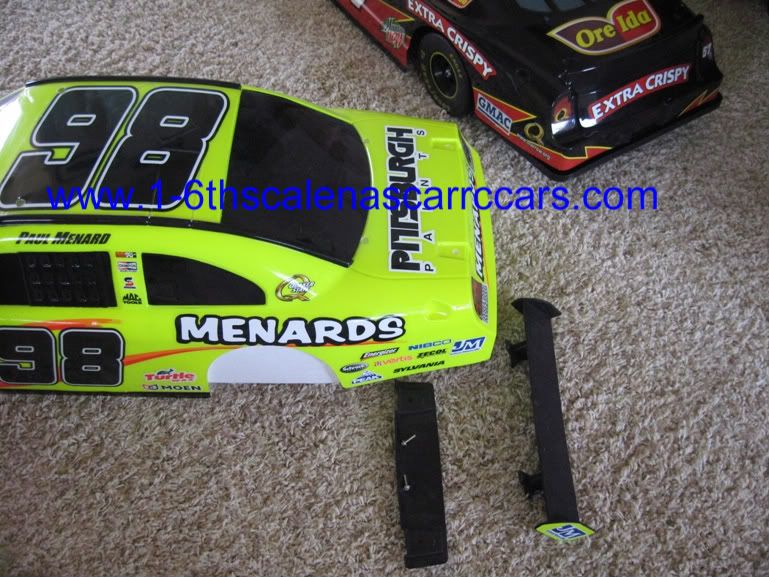
Shown next above and below is the screws for the rear wing. These are usually taped to the wing when you buy the replacement shell or conversion kit.
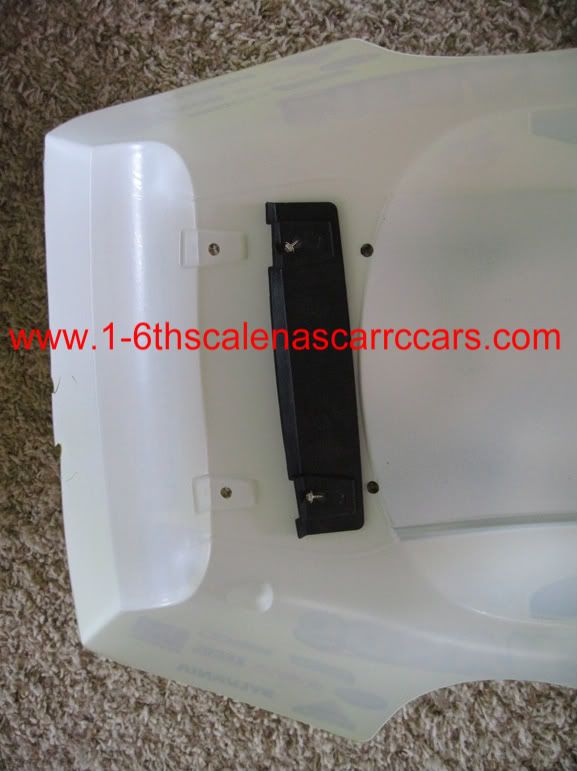
Note the raised or embossed location areas for the rear wing under the body shell.
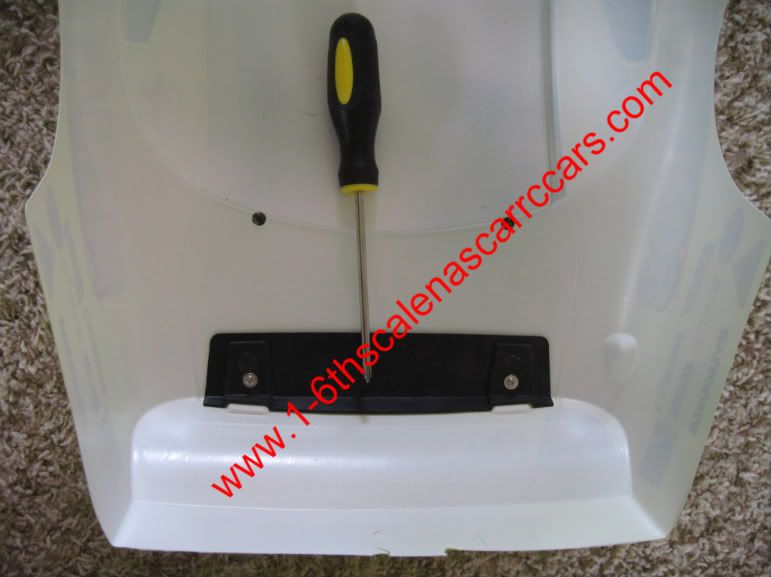
Note the raised or embossed location areas for the rear wing under the body shell. The support for the rear wing locates to these raised or embossed areas and then there is small pins on bottom of this black nylon Rear Wing that go DOWN through the body shell holes and THROUGH the support that screws fit into the rear wing. See the following 2 pictures for reference. This is IMPORTANT because if NOT PROPERLY seated, as you screw this down tighter, it will CRACK the body shell before you even use it.
TO

